Packing for a move can make or break your entire experience. Most Americans start planning their move just three months before the actual date, but packing experts recommend beginning at least six weeks earlier.
Efficient packing means more than just filling boxes. After helping families through 42 different moves, I know that successful packing starts with planning and organization. The best approach? Start early, tackle seasonal items first, and follow proven methods that save time and stress.
Moving doesn't have to overwhelm you. These 27 packing strategies will help you work smarter during your relocation. I'll share the practical techniques I've developed through years of professional moving experience - from smart decluttering methods to space-saving tricks that actually work.
Whether you're planning months ahead or facing a tight timeline, these tested approaches will keep your move organized and efficient.
Start Packing Early
The golden rule of moving is simple: start boxing up your belongings as soon as you know you're relocating. We've seen how starting the packing process early turns a stressful situation into something manageable.
Start Packing Early benefits
Starting early gives you real advantages. You won't be racing against the clock, which keeps stress levels down. You'll have time to look at each item and decide if it's worth moving. Your fragile items get proper protection instead of rushed packing. Most importantly, you might avoid hiring professional packers at approximately $60 per hour per packer.
How to plan your packing timeline
Begin packing one to two months before moving day. The time you need depends on your home size. A one-bedroom takes 2-3 days, a two-bedroom needs 5-6 days, and a three-bedroom requires a week or more.
Here's how to break it down:
- 6-8 weeks before: Get supplies and start decluttering
- 3-4 weeks before: Pack seasonal items and things you rarely use
- 2 weeks before: Pack kitchenware and non-essential items
- 1 week before: Finish packing, keep only daily necessities unpacked
Start with areas you use least - the attic, guest room, or basement. This gives you space to stack packed boxes without getting in your way.
Common mistakes to avoid when starting late
Waiting too long creates problems. You won't have time to sort through everything properly, so you might move things you don't need. Rushing leads to running out of supplies mid-packing - a frustrating interruption. People often pack breakables poorly when they're hurrying. Many forget to pack an essentials box with medications, toiletries, and basic tools for your first day.
Good time management during packing prevents last-minute chaos and keeps everything organized.
Purge Before You Pack
Decluttering before you start packing is the most important step in any move. When you pack without sorting first, you end up moving items you don't need and paying extra for the privilege.
Why purging helps
Decluttering before moving delivers immediate benefits. You'll save money since moving companies charge based on the weight and volume of your belongings. You'll save time by avoiding the need to sort through unnecessary items while packing. Decluttering reduces stress and gives you more control during an overwhelming process. Your new home will feel more spacious, which matters especially if you're downsizing.
How to declutter efficiently
Start your decluttering several months before moving day. Two weeks isn't enough time for a thorough purge. Work on one area at a time, spending a few hours each day on a specific space.
Three effective approaches:
- Category method: Sort by item type (all clothes, all books) instead of room by room
- Four-box system: Use boxes labeled "Keep," "Donate/Sell," "Trash," and "Relocate"
- Room-by-room approach: Finish one complete room before moving to the next
Make decisions quickly. Skip the "maybe" pile - it usually becomes the largest and just delays hard choices.
What to donate or toss
Items you haven't used in the past year should be donated. Good candidates for donation include clothes, kitchenware, appliances, books, toys, and furniture.
Items to throw away:
- Expired food, medications, and toiletries
- Broken electronics and worn-out shoes
- Duplicate kitchen items you never use together
- Old paperwork and tax returns over seven years old
Moving gives you the perfect opportunity to simplify your life. Less stuff means more freedom in your new home.
Use a Moving Checklist

Image Source: Type Calendar
A moving checklist keeps your relocation organized from start to finish. This essential tool acts like a roadmap, guiding you through each step without missing important details.
What to include in your checklist
Your checklist needs clear organization by timeframes. Start 8 weeks before moving day and continue through your first week in the new home. Include these essential components:
- Tasks by timeline: Organize activities into 8-week, 6-week, 1-month, 2-week, 1-week, and moving day sections
- Contact information: Keep phone numbers for movers, utility companies, and service providers handy
- Box inventory: Track what goes in each container
- Budget tracking: Monitor all moving expenses
Add both preparation tasks and setup activities like utility transfers and lock changes for your new home.
How a checklist saves time
Good organization prevents wasted effort. You'll know exactly what needs attention next without wondering "what did I forget?". A checklist also helps you spot tasks that can happen at the same time, making the whole process faster.
You'll avoid expensive mistakes like missed utility cutoffs or forgotten paperwork deadlines. A solid checklist turns potential chaos into smooth, organized progress.
Best tools to create one
Paper checklists work well, but digital options offer extra features:
- MoveAdvisor: Provides moving timelines with inventory tracking
- Google Keep: Simple checklist creation with reminder alerts
- Trello: Organizes tasks into boards for different moving phases
- MyMayflower Move Portal: Lets you check off completed items
Choose the format you'll actually use. The best checklist is one that stays with you throughout your move.
Choose the Right Boxes and Totes
Getting the right containers saves time and protects your belongings during the move. Both cardboard boxes and plastic totes work well, but each serves different purposes.
Boxes vs. totes
Cardboard boxes cost less and work great for single moves. They stack easily in trucks and you can recycle them when finished. The downside? They get weak when wet and can't handle too much weight.
Plastic totes last longer and keep moisture out. They protect fragile items better and you can use them again for future moves. They do cost more though - expect to pay $10-$50 per container.
Best items for each type
Use cardboard boxes for:
- Heavy items like books, tools, and canned goods (use small boxes)
- Hanging clothes in wardrobe boxes
- Pictures and mirrors in specialty boxes
- Important documents in file boxes
Use plastic totes for:
- Items that need protection from water
- Seasonal items going into storage
- Fragile belongings needing extra security
- Moving during rainy weather
Where to get them
Home improvement stores sell cardboard boxes for $1-$3 for small sizes, $5-$10 for extra-large. Moving companies like U-Haul also stock them, plus you can order online. Professional moving boxes come in different sizes with special options for dishes, TVs, and wardrobes.
Looking to save money? Check Facebook Marketplace or Nextdoor for free used boxes. You can buy plastic totes at department stores or rent them from moving companies - a smart choice if you want the benefits without buying.
Label Boxes with Numbers and Rooms
Properly labeling your boxes makes unpacking faster and keeps your move organized. This simple step prevents confusion and saves hours of searching through boxes in your new home.
Why labeling matters
Good labeling saves time during unpacking. When boxes show their contents and destination room, you know exactly where everything goes without opening each box. Clear labels help track your belongings and prevent items from getting lost. For fragile items, proper labeling tells movers to handle boxes with extra care.
How to create a labeling system
Choose a system that works for your move:
- Number coding: Give each box a unique number, write it on three sides (like "1 Kitchen"), then keep a list of what's inside
- Room designation: Write both contents and destination room (like "Kitchen - Coffee Maker & Mugs")
- Priority system: Mark boxes as Priority 1 (open first), 2 (important), or 3 (can wait)
Label boxes right after packing them to avoid confusion. Skip vague labels like "miscellaneous".
Using color codes and QR codes
Colors speed up your move because people recognize colors faster than words. Use colored tape or stickers for each room. Put color charts at entry points in your new home so movers know where boxes belong.
QR codes work well for detailed organization. Create codes that link to lists of box contents, then scan with your phone to see what's inside.
Pack by Category, Not Room
Packing by category instead of room creates a more organized moving system. This method groups similar items together regardless of their current location, making your entire move more efficient.
Why this method works
Category packing works best when your new home has a different layout than your current one. Similar items stay together, making unpacking much easier. You'll spot duplicates immediately, helping you declutter as you pack. This approach is perfect for smaller homes or anyone wanting a fresh start.
Examples of categories
Smart categories to organize your packing:
- Clothing (by season or type)
- Kitchen items (by function)
- Books and media
- Electronics (with cords)
- Toiletries and bathroom supplies
- Decorative items
When you label these categories clearly, you can prioritize which boxes to unpack first.
How to stay organized
Label each category box with detailed contents. Professional movers recommend using same-size boxes when possible for easier stacking. Take photos of packed boxes or keep a simple inventory list. Complete one category fully before starting the next to avoid confusion.
Use Clothes and Linens as Padding

Image Source: Tag-A-Room
Smart packing doesn't require expensive materials. Using clothes and linens you already own protects fragile items while saving space and money.
How to wrap fragile items
Start with clean towels, blankets, and clothing like t-shirts and sweaters. Wrap each fragile piece completely, padding all sides. For stemware and tall glassware, clean socks work perfectly and save space. Small items like aromatherapy diffusers fit securely between two hats.
For plates and dishes, wrap each piece separately, then layer clothing between them to prevent contact. Secure these layers with painter's tape to prevent shifting without damaging your belongings.
What to avoid
Never use dirty or damp clothing as padding - it can stain or damage your belongings. Don't rush the wrapping process. Thin fabrics won't protect items that need substantial cushioning. Avoid overloading boxes with too many fragile items, even when well-wrapped.
Pro tips for maximizing space
Keep clothes in dresser drawers instead of moving them. Pack smaller items inside larger ones to save space. Use clothing strategically - bulky sweatshirts protect electronics well, while t-shirts work great for kitchenware. Press down on bedding and linens frequently to release trapped air and maximize space.
Use Zip-Top Bags for Small Items
Zip-top bags solve one of the biggest moving headaches - keeping track of small items. These clear bags make everything visible and prevent the frustration of lost screws or missing jewelry pieces during your move.
Best items to store
Zip-top bags work perfectly for organizing small possessions:
- Hardware components: Store screws, bolts, and nuts from furniture in labeled bags for easy reassembly
- Jewelry pieces: Keep earrings, rings, and necklaces organized and tangle-free
- Office supplies: Contain paperclips, push pins, and rubber bands where you can see them
- Bathroom items: Secure toiletries and liquids that might leak during transport
- Electronics: Keep small parts, cords, and chargers together
How to label them
Label each bag clearly with the furniture piece or category it belongs to. Use masking tape or adhesive labels instead of writing on the bag directly. Create a numbering system that matches your inventory list. Attach labeled bags directly to the corresponding furniture whenever possible.
Reusing after the move
These bags stay useful for home organization after your move. Wash them with soap and warm water, then let them air dry completely. Most zip-top bags can be reused several times. Throw away any bags that held raw meat, eggs, or items with allergens. Replace bags that show tears, stretching, or lingering odors.
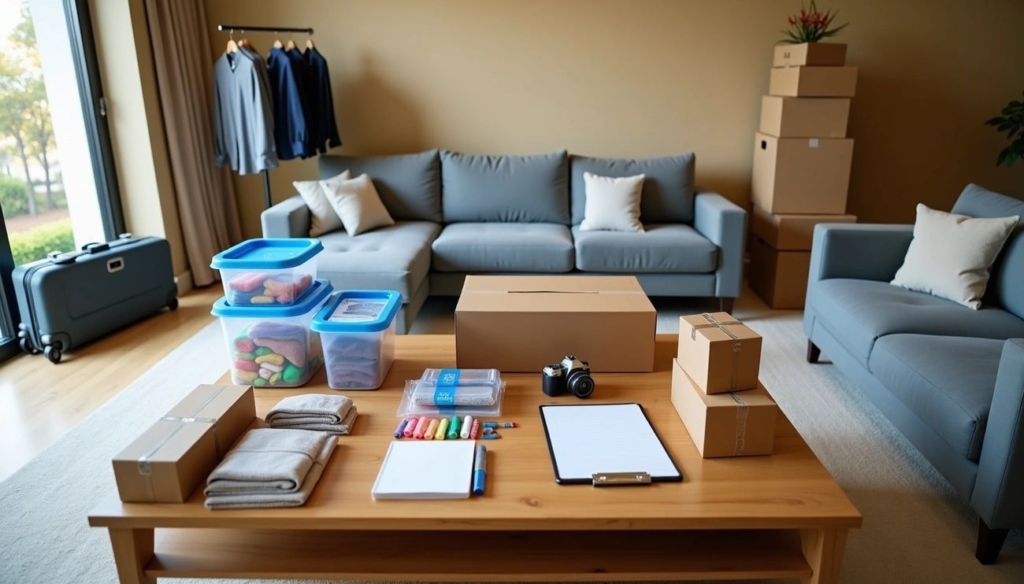
Create a Packing Supply Kit

Image Source: Popular Mechanics
Getting your packing supply kit ready before you start boxing items makes the entire process smoother. This simple step prevents those frustrating trips to the store when you're halfway through packing.
What to include
Your packing kit needs these essentials:
- Boxes in different sizes - small for heavy items, medium for kitchen stuff, large for lightweight bulky items
- Quality packing tape with a dispenser or tape gun
- Protection materials - bubble wrap, packing paper, and stretch wrap
- Box cutter and permanent markers for sealing and labeling
- Furniture covers and moving blankets
- Ziplock bags for small parts and hardware
- Basic tools for taking furniture apart
You can buy a pre-assembled packing supply bundle sized for your home if you want everything at once.
Where to store it
Keep your supplies in one portable container that you can move from room to room easily. Set up a "packing station" in a central spot where everything stays organized but within reach.
Why it saves time
Having everything ready eliminates those mid-packing store runs. You stay focused and keep your momentum going. During busy moving seasons, getting supplies early prevents delays from store shortages.
A well-organized supply kit turns packing from a chaotic scramble into an organized process that actually works.
Pack an Essentials Bag
Preparing an essentials bag keeps you comfortable during those first crucial hours in your new home. This bag contains everything you need before unpacking begins.
What to include
Your essentials bag needs items for the first 24-48 hours: toiletries (toothbrush, toothpaste, soap, shampoo), medications, and a change of clothes. Pack important documents like IDs, contracts, and moving paperwork. Phone chargers, laptops, and power banks keep you connected.
Add comfort items like snacks, water bottles, and basic kitchenware (paper plates, plastic utensils). Families with children should include toys or baby supplies. Pet owners need food, water bowls, and leashes.
Why it's important
An essentials bag gives you immediate access to necessities without digging through packed boxes. You'll avoid stress after a long moving day when you just want to settle in. This bag provides security if your belongings arrive late or unpacking takes longer than expected. Having essentials ready helps during unexpected delays.
How to keep it accessible
Transport your essentials bag personally - never load it on the moving truck. Label it with bright colors or distinctive markings so it doesn't get mixed with other boxes. Assign a family member to manage this bag throughout the move. For long-distance relocations, pack supplies for several days.
Use Suitcases for Heavy Items

Image Source: Travelpro® Canada
Your luggage works perfectly for moving heavy items. Suitcases handle weight better than cardboard boxes and save your back during the process.
Best items to pack
Suitcases work best for transporting heavy items that might damage regular boxes. Books fit perfectly in rolling suitcases where the weight spreads evenly. Small appliances like coffee makers and blenders stay protected in hard-shell cases. Heavy winter coats and sweaters pack well without crushing. Shoe collections also work great, especially when kept in their original boxes.
Why suitcases work better
Rolling suitcases eliminate the need to carry heavy loads. Hard-shell models protect your belongings better than cardboard. The wheels make moving heavy items easy across different floor types. Four-wheel spinners roll smoothly on flat surfaces, while two-wheel versions handle stairs and uneven ground better.
Rolling tips
Roll suitcases on smooth floors whenever possible. Carry them up stairs and over rough surfaces. Choose lightweight suitcases under 7 pounds when empty for long moves. Pack weight evenly to prevent tipping.
Take Photos of Electronics and Wiring

Image Source: PCMag
Untangling cords from your entertainment center or computer setup after a move creates unnecessary frustration. Taking photos of your electronic setups before disconnecting anything saves time and prevents mistakes during reassembly.
Why this helps
Photos of your electronic connections work like personal instruction manuals. You won't waste time trying to remember which cable connects where. Multiple angles help you recreate complex configurations in your new home. This simple step saves time, prevents damage, and eliminates the stress that comes with electronics setup.
How to organize cords
After taking photos:
- Wind each cord neatly and secure with twist ties or velcro straps
- Use colored stickers or masking tape to match cords with their devices
- Bundle related cables together for each device
- Consider color-coding systems for easy identification
Using zip bags for hardware
Store removed components and hardware in labeled zip-top bags. Label each bag with the device name like "Living Room TV Cords". Place electronic components in anti-static bags when possible for better protection. Attach labeled bags directly to their devices to eliminate confusion during unpacking.
Use Vacuum Bags or DIY Compression
Vacuum bags work well for bulky soft items during moves. These bags reduce the volume of textiles by 80% while keeping items protected. You can make your own version at home for much less money.
How to make your own
Making compression bags at home is simple:
- Place items inside a strong garbage bag (kitchen drawstring or large black bags work best)
- Insert vacuum hose into the bag opening
- Form a complete seal around the hose with your hand
- Turn on the vacuum until the bag stops shrinking
- Quickly remove the hose while keeping the bag sealed
- Secure the bag tightly with a rubber band or knot
This technique makes packing for college much less stressful as space becomes less of a constraint.
Best items to compress
Vacuum compression works best for:
- Fluffy bedding (comforters, quilts, pillows)
- Winter clothing with down insulation or synthetic fibers
- Blankets and towels
- Clean clothes (never compress dirty or damp items)
These items have trapped air that removes easily without damage. Don't compress latex mattresses or foam toppers, as they may tear or lose shape.
Storage tips
After compressing items, put them in hard containers to prevent tears. Use a vacuum cleaner hose instead of a hand pump—it removes air better from corners and edges. Keep compressed bags away from sharp objects on moving day. Vacuum bags work great for short moves but aren't ideal for long-term storage of valuable textiles.
Wrap Drawers and Trays

Image Source: Small Stuff Counts
Securing furniture drawers properly protects both your furniture and its contents during transport. This simple step prevents damage that can cost hundreds in repairs.
How to secure drawers
Wrap the entire dresser with plastic stretch wrap to create a tight seal around the furniture body. Apply wrap both horizontally and vertically for complete security. This method keeps all drawers locked in place during the move.
Another effective approach positions furniture with drawer sides against the moving truck wall to physically prevent them from sliding open.
What tape to use
Never use packing tape directly on wood furniture - it damages finishes and can ruin expensive pieces. Painter's tape or masking tape works best because they stick well without leaving residue behind.
After taping, add furniture pads secured with rubber bands for extra surface protection.
When to remove contents
The decision depends on your specific situation. For valuable or heavy furniture, empty drawers completely to reduce weight and prevent damage to drawer gliders.
For local moves, keeping lightweight items in drawers saves packing time. If you keep contents inside, distribute weight evenly and secure loose items with plastic wrap to prevent shifting during transport.
Use Wardrobe Boxes or Trash Bags for Clothes

Image Source: Reddit
Moving hanging clothes without removing them from hangers saves considerable time. Both wardrobe boxes and trash bags work effectively, but each serves different needs.
How to pack hanging clothes
Wardrobe boxes make transfers simple. Assemble the box following the instructions, place the metal rod in the openings, then move clothes directly from your closet to the box.
For budget-conscious moves, trash bags offer two practical methods:
- Hole-in-bottom technique: Make a small hole in the bag bottom, group 5-7 hangers together, push hooks through the hole, then pull the bag down over clothes.
- Cover-and-tie method: Pull the bag up around hanging clothes and secure the drawstring around the hangers.
Pros and cons of each method
Wardrobe boxes protect formal wear and prevent wrinkles effectively. They cost $15-20 per box and require significant truck space.
Trash bags provide an inexpensive solution that takes about ten minutes to complete. However, they offer less protection and can tear, exposing clothes to dust or moisture. Most professional movers won't transport bagged clothes because they don't stack properly.
For short local moves, old sheets work as another alternative.
Which method to choose
Choose wardrobe boxes for valuable clothing or long-distance moves. Use trash bags for short moves when budget matters more than protection. Consider the distance, clothing value, and your moving budget when deciding.
Pack Kitchen Items with Care

Image Source: Martha Stewart
Kitchenware needs extra attention during packing. These items break easily during moves, but proper packing techniques protect your dishes and glassware.
How to wrap dishes
Start with a cushioned bottom layer using crumpled packing paper. Wrap each plate separately - place it in the center of packing paper, then fold all corners over the dish. Stack plates standing up rather than flat to spread weight evenly and prevent breaks. For glasses, fill the inside with packing paper first, then wrap the outside for double protection.
Using dividers
Dish-specific boxes with built-in dividers work best for stemware and delicate glasses. These specialized containers use double-layered cardboard for better protection. Pack smaller bowls inside larger ones with packing paper between each piece to save space while keeping items safe.
Labeling fragile boxes
Mark "FRAGILE" on all sides of kitchen boxes with bright colors like red or orange. Add handling instructions like "This Side Up" or "Handle With Care". Write which room the box goes in ("Kitchen") and list what's inside. Use packing tape over labels so they don't fall off during the move.
Create a First-Night Box

Image Source: Love & Renovations
A first-night box saves you from digging through packed boxes when you arrive at your new home. This single container holds what you need for comfort during your first 24 hours.
What to include
Pack these essentials for your first night:
- Bedding: Sheets, pillows, blankets or comforters for each family member
- Bathroom necessities: Toilet paper, shower curtain, towels, toothbrushes, soap, and personal medications
- Kitchen basics: Paper plates, disposable utensils, garbage bags, snacks, and drinks
- Practical tools: Box cutter, scissors, basic toolkit for assembling beds
- Electronics: Phone chargers, laptop, power strips, and flashlights with extra batteries
We customize first-night boxes for each family's needs. Children need favorite toys or blankets. Pet owners should include food and leashes.
Why it's different from essentials bag
Your first-night box focuses on settling into your new home, while an essentials bag covers travel needs. The first-night box includes home setup items like cleaning supplies and shower curtains. Your essentials bag has snacks for the journey. Your first-night box has meal supplies for your first evening.
Labeling tips
Mark your first-night box with large "OPEN FIRST" letters on multiple sides. Use bright colors so it stands out immediately. Keep this box with you - transport it in your car rather than on the moving truck.
Label Furniture with Destination Room
Labeling furniture directly saves time and prevents confusion on moving day. This simple step helps your movers know exactly where each piece belongs without constant questions.
How to use painter's tape
Always use painter's tape instead of packing or duct tape, which can damage wood finishes or peel paint when removed. Apply the tape to hidden areas whenever possible to keep your furniture looking good. For disassembled pieces, attach labeled bags containing hardware directly to the furniture using the same painter's tape.
Color coding tips
Keep your color system simple with 5-8 distinct colors to prevent confusion. Your brain processes color faster than words, making colored labels work better than text alone. Include room names alongside furniture items expected in each space on your color chart. Make sure colors stay easily distinguishable—avoid similar shades like navy blue and bright blue that might confuse your movers.
Reducing mover confusion
Post color keys at entry points, stairwells, and hallways so movers can work on their own. Place matching colored markers on door frames at your new home for maximum clarity. Consider creating a color-coded floor plan for complex layouts. Take a few minutes before the move to explain your system to everyone helping.
This approach keeps your move organized and your movers efficient!
Packing Strategy Quick Reference
| Strategy | Main Benefit | What You Need | Key Tips | When to Use |
|---|---|---|---|---|
| Start Packing Early | Reduces stress and saves money | Seasonal items, rarely used belongings | Begin with least-used areas | 6-8 weeks before move |
| Purge Before Packing | Cuts moving costs and volume | Clothes, kitchen items, books, furniture | Sort into "Keep," "Donate," "Trash" piles | Several months before move |
| Moving Checklist | Keeps tasks organized and on track | Task lists, contact info, inventory sheets | Break into weekly timeframes | Throughout entire process |
| Right Boxes and Totes | Protects belongings efficiently | Cardboard boxes ($1-$3 small, $5-$10 large), plastic totes ($10-$50) | Match container strength to contents | During active packing |
| Number and Room Labels | Speeds unpacking significantly | Number system, room tags, priority markers | Label three sides of each box | Right after packing each box |
| Category Packing | Makes unpacking logical | Similar items grouped together | Finish one category completely first | Throughout packing phase |
| Clothes as Padding | Saves money on packing materials | Towels, blankets, clean clothing | Never use dirty or damp items | When packing fragile items |
| Zip-Top Bags | Organizes small parts | Hardware, jewelry, cords, small items | Label each bag clearly | During furniture disassembly |
| Packing Supply Kit | Prevents supply runs and delays | Boxes, tape, bubble wrap, markers, tools | Keep supplies in central location | Before starting any packing |
| Essentials Bag | Provides immediate necessities | Toiletries, medications, chargers, documents | Carry personally, not in truck | Pack last, open first |
| Suitcases for Heavy Items | Reduces physical strain | Books, small appliances, winter clothes | Distribute weight evenly | During main packing phase |
| Electronics Photos | Ensures correct reassembly | Camera or phone for documentation | Photograph from multiple angles | Before disconnecting anything |
| Vacuum Compression | Reduces volume by 80% | Bedding, winter clothing, soft items | Avoid foam or latex materials | During textile packing |
| Drawer Securing | Prevents damage and spillage | Stretch wrap, painter's tape | Never use packing tape on wood | Before furniture moving |
| Wardrobe Solutions | Keeps clothes wrinkle-free | Wardrobe boxes ($15-20) or trash bags | Choose based on clothing value | When packing hanging items |
| Kitchen Item Care | Prevents breakage of dishes | Dish boxes, packing paper, dividers | Stack plates vertically, not flat | During kitchen packing |
| First-Night Box | Ensures immediate comfort | Bedding, bathroom items, basic tools | Mark "OPEN FIRST" clearly | Pack last, unpack first |
| Furniture Labeling | Directs proper placement | Painter's tape, color-coded system | Post color guide at new home entrance | Before moving day |
Conclusion
Moving doesn't have to overwhelm you when you have the right packing strategies. These 27 techniques work together to turn a stressful relocation into a manageable project. After helping families through 42 different moves, I know that proper preparation makes the difference between chaos and control.
Starting early remains the most important advice. You'll have time to sort belongings thoughtfully, pack items safely, and avoid the rush that leads to damaged goods or forgotten essentials.
Smart labeling systems save hours during unpacking. Color-coded boxes, numbered containers, and detailed inventories might feel like extra steps now, but they eliminate confusion later. Packing by category instead of room creates logical groups that make settling in much easier.
Simple space-saving tricks work incredibly well. Vacuum bags shrink bulky items, suitcases handle heavy books, and keeping clothes on hangers eliminates folding time. Your household items can protect fragile pieces just as effectively as expensive packing materials.
Essential bags and first-night boxes ensure comfort when everything else stays packed. Having immediate access to necessities provides relief after an exhausting moving day.
These packing methods work as a system. Each technique supports the others to create an efficient process from start to finish. You don't need to use every strategy - even a few key approaches will improve your moving experience significantly.
Your move marks a fresh start. Taking time to pack thoughtfully sets a positive tone for this new chapter. With these proven techniques, you can focus less on logistics and more on the exciting possibilities waiting in your new home.
Keep your next move on schedule, on budget, and stress-free.
FAQs
Q1. How far in advance should I start packing for a move? It's best to start packing 6-8 weeks before your move date. This gives you ample time to sort through belongings, declutter, and pack methodically without feeling rushed. Begin with items you use less frequently and gradually work your way to everyday essentials.
Q2. What's the most efficient way to pack a house quickly? Start by packing rarely used items first. Group similar items together based on room or usage. Keep a separate box for essentials you'll need immediately in your new home. Use a color-coding or numbering system to organize boxes by room, making unpacking more efficient.
Q3. Which room typically takes the longest to pack? The kitchen is often the most time-consuming room to pack due to the variety of items and their fragility. Start packing lesser-used kitchen items early, leaving everyday essentials for last. Use specialized dish packs for fragile items and wrap glasses individually for extra protection.
Q4. How can I make unpacking easier in my new home? Create a "first-night box" containing essentials like toiletries, medications, chargers, and basic kitchen items. Label boxes clearly with their contents and destination room. Consider color-coding or numbering boxes to quickly identify where they belong. Prioritize setting up bedrooms and bathrooms first for immediate comfort.
Q5. What's the best way to protect fragile items during a move? Use clothes, towels, and linens as padding for fragile items to save on packing materials. Wrap dishes and glassware individually in packing paper. Use specialty boxes with dividers for stemware. Clearly label boxes containing fragile items and consider transporting these yourself if possible.
References
[1] - https://www.usamover.com/18-essential-spring-moving-tips-for-a-stress-free-transition/
[2] - https://www.thespruce.com/incredibly-useful-packing-hacks-4054126
[3] - https://teaspoonofadventure.com/packing-and-moving-tips/
[4] - https://www.moving.com/tips/moving-tips-moving-hacks/
[5] - https://blog.ronnieisenberg.com/2025/02/19/packing-and-moving-tips/
[6] - https://www.goarmstrong.com/resources/when-to-pack-for-moving/
[7] - https://schmidtmovers.com/2025/04/15/when-to-start-packing-for-a-move/
[8] - https://moving.tips/packing-tips/reasons-why-you-should-start-packing-early/
[9] - https://suddath.com/moving-company/moving-tips/create-a-5-step-packing-timeline/
[10] - https://moveadvisor.com/move/when-to-start-packing-for-a-move/
[11] - https://moveadvisor.com/move/packing-timeline/
[12] - https://moveadvisor.com/move/packing-mistakes-when-moving/
[13] - https://www.alliancemoving.com/blog/10-most-common-moving-mistakes
[14] - https://www.jimallen.com/6-common-mistakes-to-avoid-when-moving/
[15] - https://alphapackersandmovers.com/what-is-the-importance-of-time-management-during-packing-and-moving/
[16] - https://www.roadwaymoving.com/blog/10-benefits-of-decluttering-before-a-move/
[17] - https://www.unitedvanlines.com/moving-tips/blog/how-to-declutter-before-your-move
[18] - https://www.aarp.org/home-living/how-to-declutter-before-moving/
[19] - https://www.realsimple.com/what-to-declutter-before-you-move-11736062
[20] - https://www.becomingminimalist.com/move/
[21] - https://www.move.org/printable-moving-checklist-for-homeowners/
[22] - https://updater.com/moving-tips/the-most-epic-moving-checklist-in-the-history-of-moving-checklists/
[23] - https://www.homedepot.com/c/ab/moving-checklist/9ba683603be9fa5395fab901e92cbf83
[24] - https://www.nerdwallet.com/article/mortgages/moving-checklist
[25] - https://moveadvisor.com/move/moving-checklist/
[26] - https://www.apartmenttherapy.com/moving-checklist-181394
[27] - https://www.jkmoving.com/blog/residential-moving/moving-apps-devices
[28] - https://www.mayflower.com/the-only-moving-checklist-youll-ever-need
[29] - https://www.stackmoves.com/totes-or-boxes-for-moving/
[30] - https://goatonatote.com/plastic-moving-totes-vs-cardboard-boxes/